The expense generator will allow you to track all expenses for your properties.
To access Expenses, Enter the Property file you would like to add the expense for
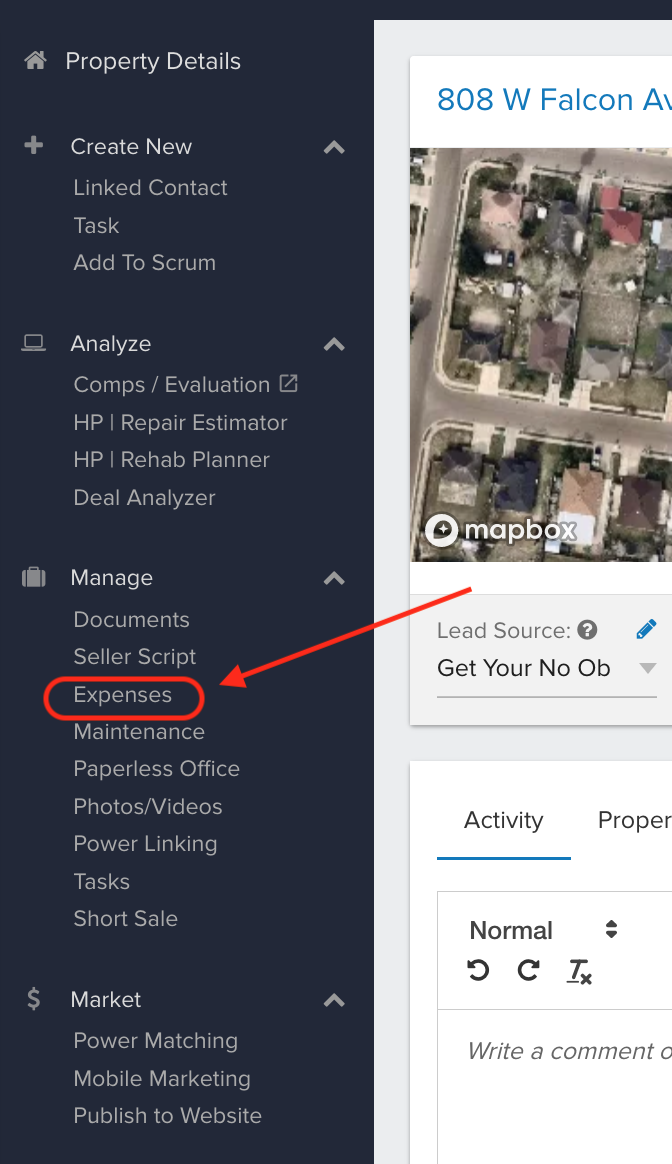
Click on EXPENSES in the 'Manage' section on the left hand side of the screen.
Here you will see a list all expense items that have been entered in a given time period.
This date will appear in the upper right hand corner of that window and you can change it at any time by clicking on the selected date range button. Clicking that button that will allow you to select the date range that you would like to see for the expense items being displayed.
To add an expense:
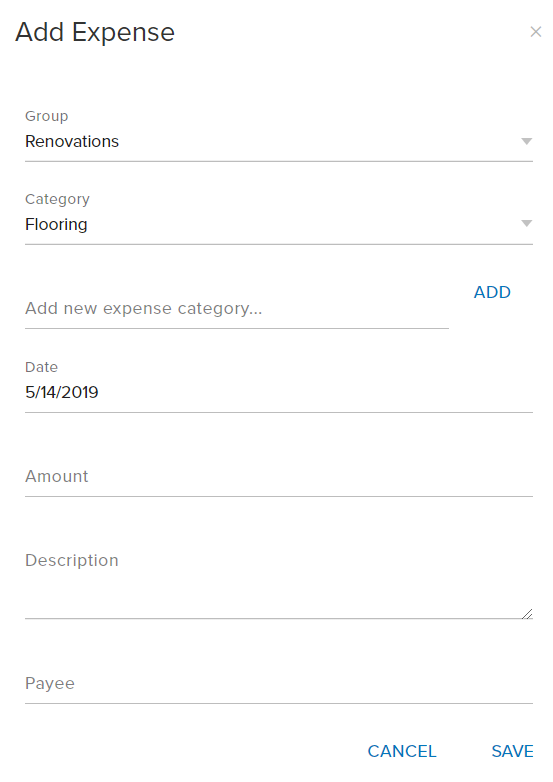
Click on ‘Add New’

Select a Category from the drop down.
You can enter a category by typing in the ‘Add New Category’ field and clicking ‘Add’. When you do this, this category will be available in the drop down moving forward.
Select a Date by clicking on the calendar icon to the right of this field
Enter the amount of the expense
Enter a description of the expense
Enter the payee of the expense
Click on the ‘Save’ button.
Exporting your Expenses:
You are able to export your expenses by clicking on the Export button.

Once the expense generator report has been created, you will receive a pop-up notification, prompting you to download that file. You can click on the download file button in order to save that file on your computer.


Josh Tobias
Comments