To setup your Repair Estimator defaults:
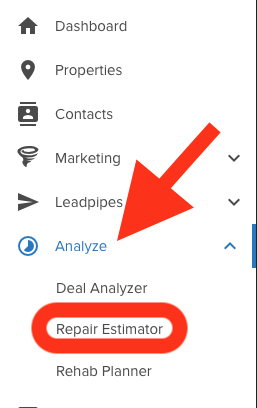
1. In the Side Navigation go to Analyze > Repair Estimator
2. Once in the Repair Estimator click on the ‘Repair Estimate Defaults’ tab
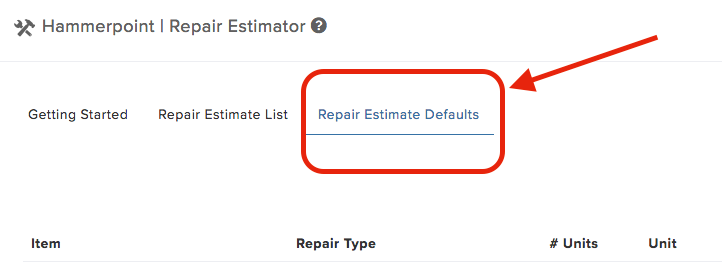
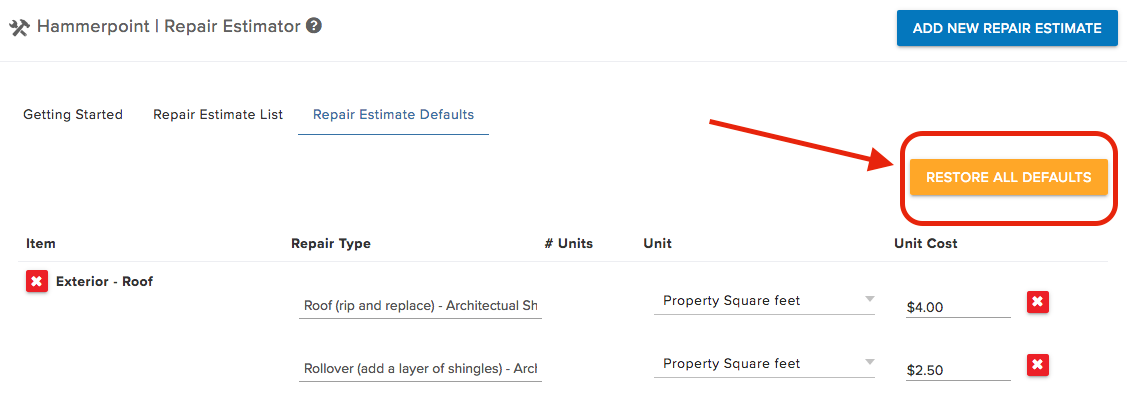
Here you will see all the defaults for each section and repair types in a section. You will now be able to:
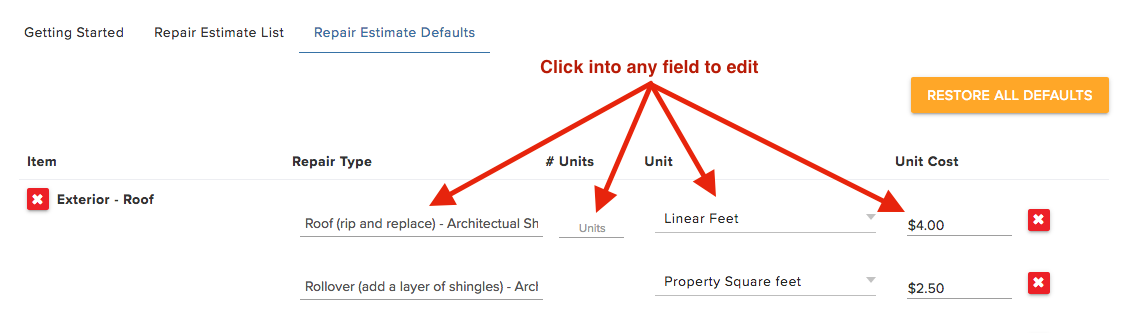
- Edit any repair types within a section
- Add/Delete any Repair Type
- Add/Delete any Section
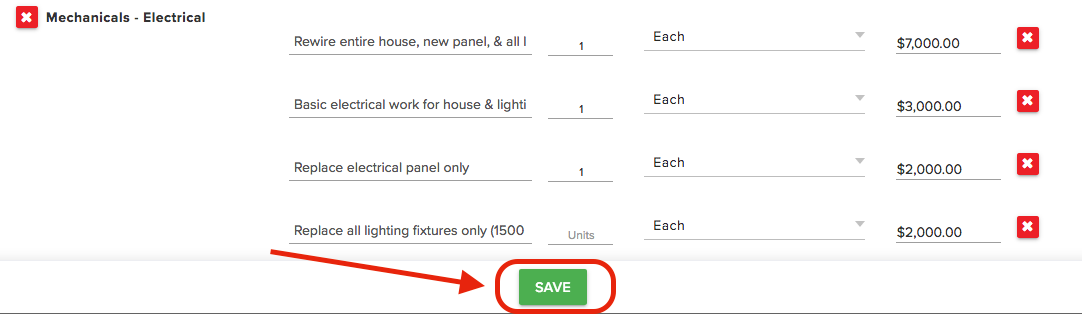
Editing a Repair Type:
For any Repair Type you can edit these fields:
- Repair Type- name of the repair
- # Units- # of units for the repair type
- Unit- select the type of unit from Liner Ft, Square Feet, Each, etc
- Unit Cost- cost of the repair
**Make sure to always hit the Save button on the bottom of your screen when making edits
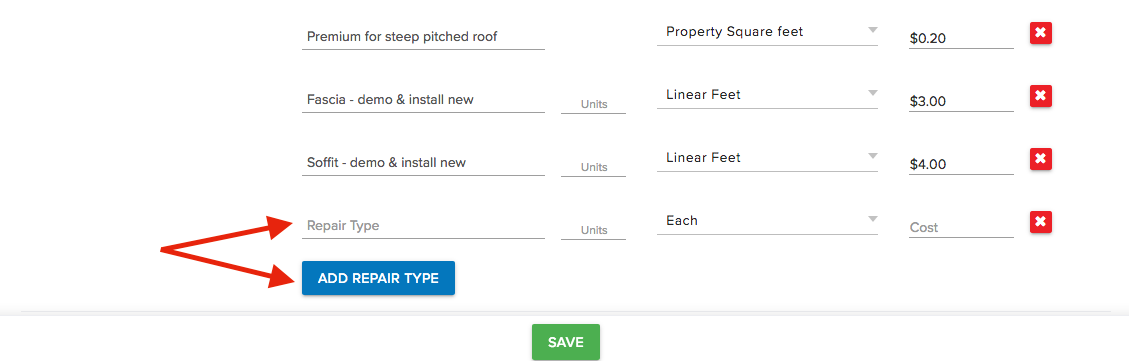
Adding a Repair Type:
At the bottom of each section you see a button 'Add Repair Type'. Click that button, enter in the details of the new Repair Type and click 'Save'
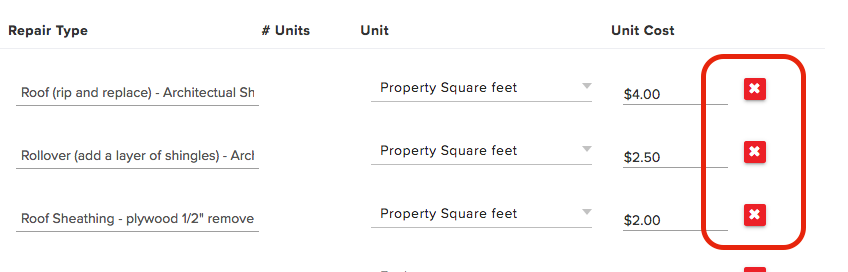
Deleting a Repair Type:
To the right of each Repair Type you will see a red 'X' button. Click that button to remove a individual Repair Type
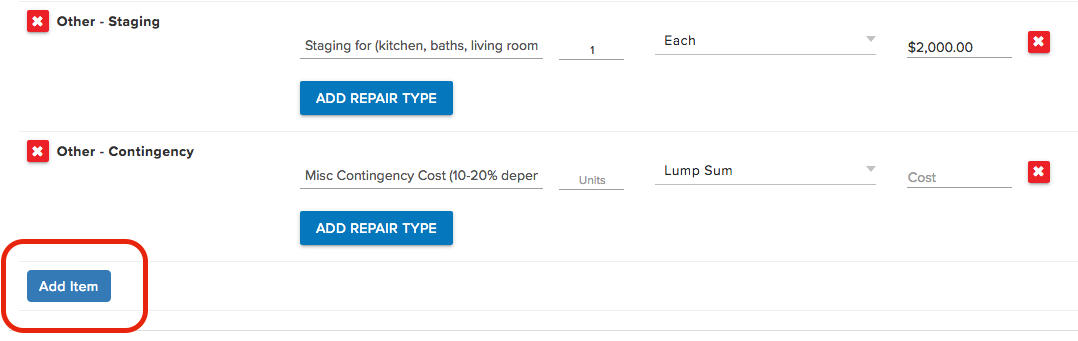
Adding a Section:
To add a Section go to the bottom of the Repair Estimates Defaults and click on 'Add Item
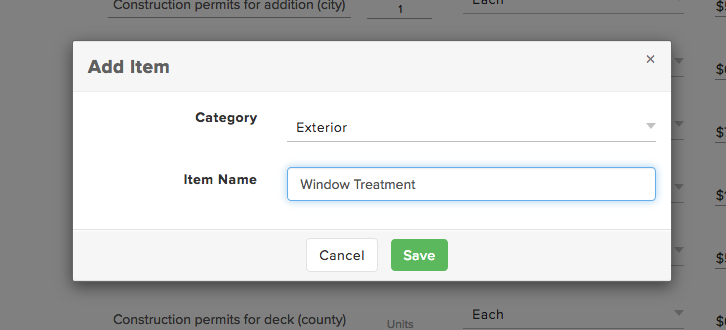
Next select the Category (Exterior, Interior, Other), fill out the Item Name, and click the Save button
You will now see the new Section created where you will be able to add Repair Types

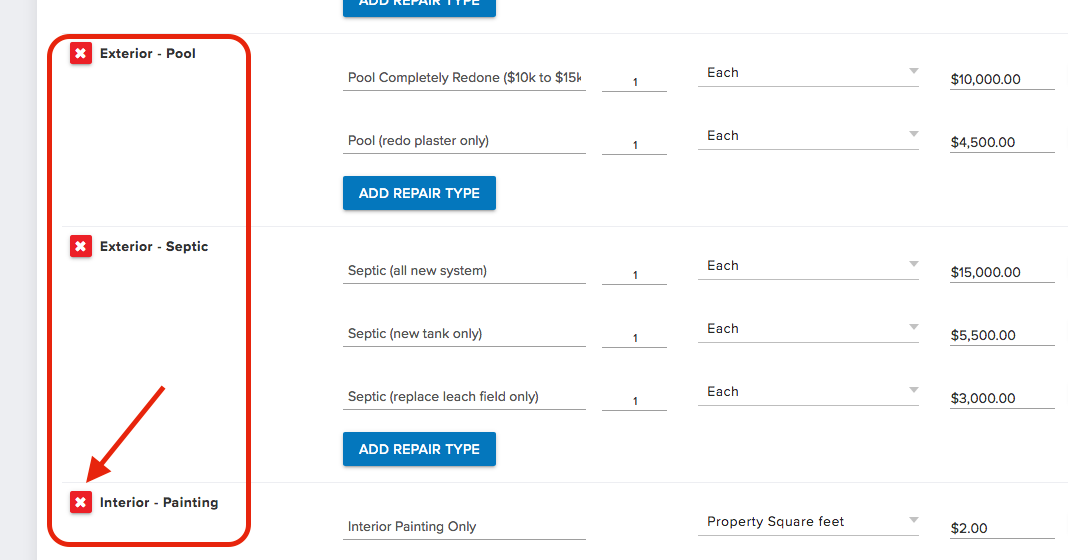
Deleting a Section:
To delete a Section, to the left of the Section Name you will see a red 'X', click the 'X' and the Section will be removed from the list of Defaults
**Once you have set your defaults hit ‘Save’ at the bottom of your screen.
**To restore the factory defaults click on ‘Restore All Defaults’ at the top of the Repair Estimate Default
Josh Tobias
Comments